Kid sized Proton Pack 2

Last night I finished up all the little details, adding some black and red plastic bits for realism:

I also attached some rings, wires and such from my PC parts bin.  This is why keeping old computer junk is handy.  The movie packs have technical looking labels on them so I fired up Google and found a PDF that had all the images on it.  Hobby Lobby sells sticker paper that you can run through a printer so after a quick print I had this:

To simulate wear and tear, I brushed on some steel enamel hobby paint on the edges:

For the straps I reused straps from an old backpack.  To make it comfortable, I zip tied on some pipe insulation onto the PVC frame:

Its now time to bust some ghosts!

Part one can be found here: Part 1

Kid sized Proton Pack

Jack wanted to be a Ghostbuster this Halloween.  I didn’t really find any good kid sized Ghostbusters costumes so I figured I can come up with something.  It needed to be light so making it out of wood was out, I was already working on foam tombstones for the front yard so I decided to use the foam.  I went to GBFANS (a great site with tons of Ghostbusters info/plans etc) and got some ideas. I cut out some foam into the basic shapes and covered it in bondo. After sanding and smoothing it a bit I hot glued on some plastic pieces and other objects to give it the basic look:

The frame for the pack is made from PVC pipe:

The red piece is a plastic clip of some sort that was lying around, I figured it would make a good holder.   I epoxied the PVC frame to the pack but wasn’t so sure if that would hold up.  I added some conduit clips screwing them into the foam back.  To make sure the screws stayed put, I dabbed some Gorilla Glue into the screw holes.  The wand is made from PVC pipe, a PVC electrical box and a old rocker switch:

With everything secured and dry I sprayed primer over everything and then layered on some flat black:

Tonight I’ll finish up some little details like the pack straps, decals and if I have time a pair of goggles. Part 2

DIY Tombstone Weathering

I painted the gravestones using 3 of the “Stone” spray paint colors.  After I had used up the cans I was left with two gravestones that needed painting, for those I mixed black paint into the Gesso and made grey. To weather the stones I mixed black paint with water and used various brushes and rags on the stones:

The lettering was painted in using black paint by my understudy.

A steady hand he has, I must say!
Part 1 can be found here: Part 1
Part 2 can be found here: Part 2

DIY Tombstone Lettering

For the lettering I printed up silly names to place onto the Styrofoam tombstone boards:

Using a ball point pen I followed around the lettering which left an indention on the surface:

Using a Sharpie helped make the lettering easier to see:

I’m not sure if it was the Sharpie ink or just by me pressing while writing but there was a nice indention left after filling it in.  I wanted it deeper so using a soldering iron I melted out the black areas

If you decide to use a soldering iron you may want to practice first on some scrap.  It melts quickly and you have to keep moving.  Next I’ll finish up the painting and some other details like weathering and moss.
Part 3: DIY Tombstone Weathering
Part 1: DIY Tombstones

DIY Tombstones

We don’t normally decorate for Halloween so for the kids this year I decided to mock up a graveyard for the front yard.  I wanted something that would be easy to make, setup and take down.  Using wood was out of the question because of the weight and cost so I decided to use extruded foam insulation. I gathered the following and got to work:

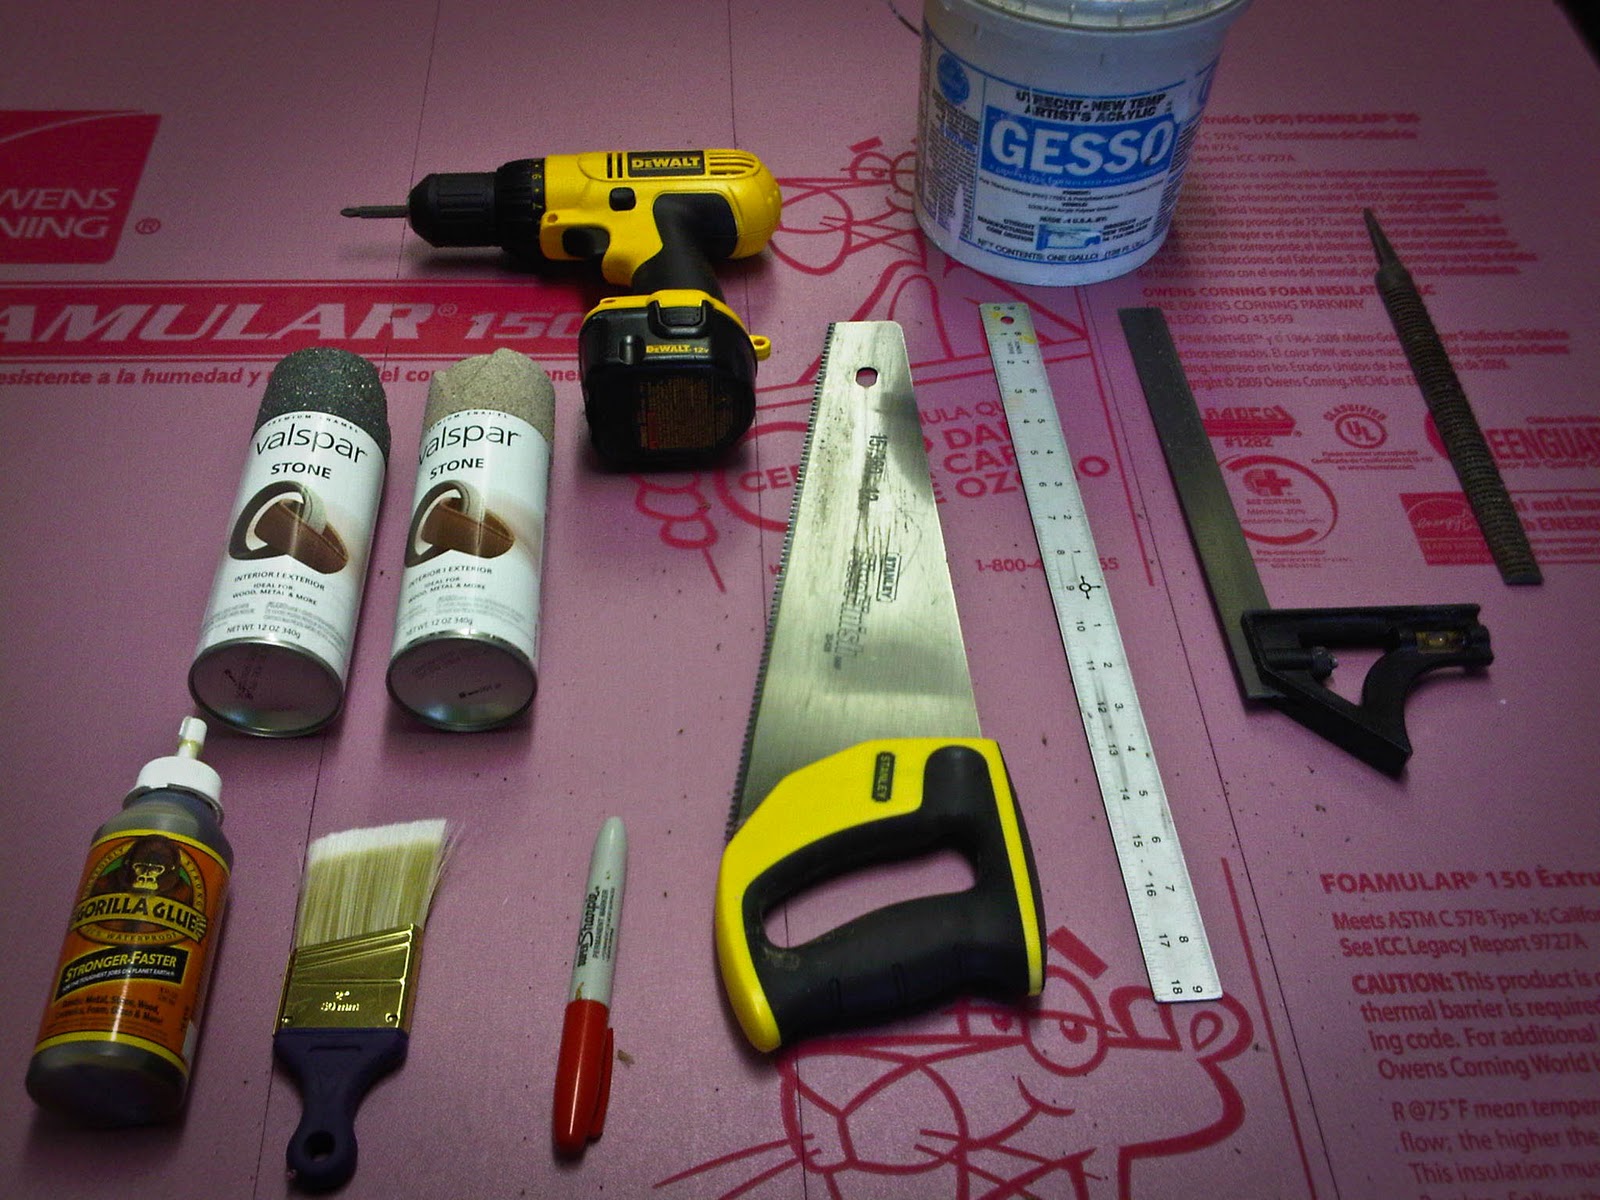
  • 4X8 Sheet of 2″ pink foam insulation (Home Depot)
  • Acrylic Gesso and brush
  • Stone colored spray paint
  • Gorilla Glue
  • Saw, rulers, marker
  • wood rasp file

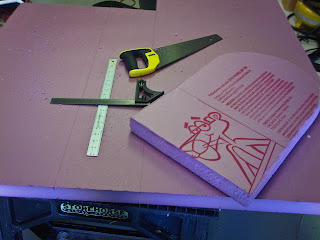
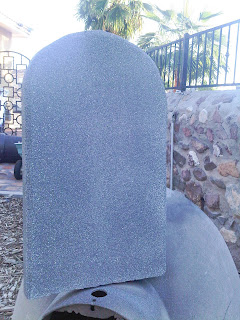
I didn’t know how many I would be able to make so I just started to cut out basic tombstone shapes and as I wound up with cut-off pieces I glued those together to form cross shaped tombstones:

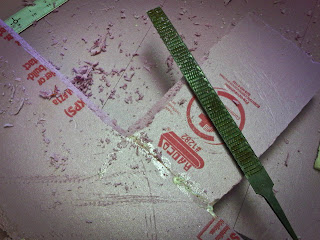
The Gorilla glue expands as it sets so you need to make sure and clamp the pieces to be glued together.  Once its dry any excess can be trimmed off as it has the same consistency as the foam insulation.  I used the wood rasp to break down the edges to give each tombstone a weathered look

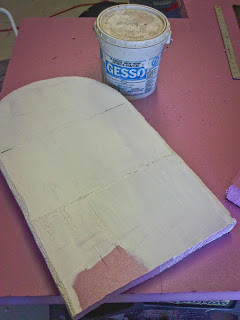
Between the cutting and filing quite a bit of foam shavings get generated, so I kept my shop-vac handy and cleaned as I went along.  In all I was able to make 11 different tombstones with most of the waste being the cutoff material.  Once I had all the forms cut. glued and cleaned up I put on a coat of gesso.  I suppose regular primer would work, but I had the gesso handy.

To paint them I screwed a long wood screw through the a dog house outside, stuck them on top and blasted them with the stone spray paint.

Next I’ll add some lettering. Part 2: Lettering